If you have a light switch that makes a popping or crackling sound when you flip it if you’d like to upgrade your switch’s style or functionality, or if your switch is broken, here are seven easy steps to replacing a light switch yourself.
Tools You’ll Need: Screwdriver, Wire Cutters, Wire Strippers, Wire Tester, Utility Knife, Flashlight, or another portable light source
-
Cut Power to The Circuit You’re Working On
Make sure that the outlet or the switch you are working with that the power is shut off. You want to go to the breaker panel, you want to turn off the circuit and make sure if you have your tester, turn it on, and then make sure all of the wires are dead. Now, if there’s still power, your tester should light up or make noise.
-
Separate Wires By Color
The next thing you want to do is separate your wires by color. So, get all the black wires together, all the white wires together and all of the copper ground wires together.
-
Strip and Clip Wires to Prepare for a Pigtail
The next thing you want to do is separate your wires by color. So, get all the black wires together, all the white wires together and all of the copper ground wires together.
-
Twist Same Colored Wires Together
Take all the black wires together and twist them together clockwise. The reason you go clockwise is that when you go to put on the wire nut, you’re going to be screwing it clockwise and you want the wires to tighten in on each other. Once you have that done, clip off the end and make sure it’s straight and that the wire nut will cover the exposed copper. Then take the wire nut and screw the wire nut on. Do the same with all the white wires and copper wires. Now, you have all the neutrals together and one wire that’s much longer when the other wires are pushed back into the box
-
Make Fresh Connections on Each of the Wires
Now you have got wires that are plenty long to work with. However, you don’t need an excessive amount of wire. If you have longer than 6-7 inches (roughly the width of your hand with fingers spread), clip them off to not be more than 6-7 inches out from the wall. Now you’re ready to put in a new outlet or switch. Just strip these and make fresh connections.
-
Install a New Outlet or Switch
We hope you’ve found this information helpful! Have a question? Need instructions for a DIY project? Leave a suggestion in the comment section below.
Video Transcript
How To Make An Electrical Pigtail
Do you want to know how to make a pigtail? It’s not that – it’s not that either. C’mon, I’ll show ya! An electrical pigtail can be useful. So, let’s go learn how to make one.
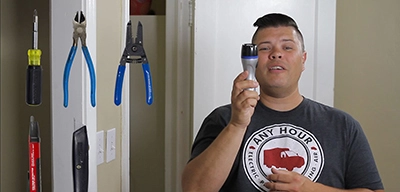
Alright, like in our other videos, we’ve got the navigation up top. We have INTRO, OVERVIEW, TOOLS and of course, the PROJECT itself.
Now over here, we’ve got these wires from where we pulled an outlet out of the wall and they’re short. If you ever pull an outlet or a switch out of the wall and you’ve short wires, knowing how to make an electric pigtail can be useful.
The tools that you are going to need to do this:
- Pliers Wire cutters
- Wire strippers
- Utility knife Tester Extra Wire (in each color)
- Wire nuts or push-in style connectors
Now, safety first. I know if the wires are already out of the wall, you can safely assume . . . you know what, I’m not going to assume. You know what happens when you assume —
Make sure that the outlet or the switch you are working with that the power is shut off. You want to go to the breaker panel, you want to turn off the circuit and make sure if you have your tester, turn it on, and then make sure all of the wires are dead. Now, if there’s still power, your tester should light up or make noise.
Now, really with a pigtail, all you’re doing is you’re taking a group of wires, you’re clumping them together and then you’re having 1 long wire coming off of it. So, if you use these push-in connectors, you want to make sure that you know how many wires are in the box. If you have 3 wires coming into the box, as I do, you’re going to want to make sure it has at least 4 holes because you need a spot for each one of the 3 existing wires and then one for that long wire coming off. If you use the push-in connectors, it’s pretty straightforward and explanatory how you push the wires in.
I’m going to use the wire nuts and show you how to use those properly.
The next thing you want to do is separate your wires by color. So, get all your black wires together, all your white wires together and all of your copper ground wires together.
So, I’ve got some extra wire here. I’m going to take out so I’ve got one of each – I’ve got a black wire, a white wire and I’ve got this copper ground wire.
Now, in the box, you can see that these wires are actually of different lengths. So, what I’m going to want to do is to strip them so that they are the same length and then clip them. So that when I go to put my pliers on and twist, they’re the same size.
The wire that I’m going to strip for the pigtail, I want to strip and have the copper exposed at the same length as the wires that I have here on the wall.
So one of the things that I see a lot of people do as a homeowner that’s different than how an electrician would do is they put the wires together and then just slip a wire nut on them and they screw a wire nut on.
Now, as an electrician, I was taught, that I need to take these wires and I need to twist them together. You want to twist them – clockwise. Now, the reason you go clockwise is that when you go to put on the wire nut, you’re going to be screwing it clockwise and you want the wires to tighten in on each other. Now, see how tightly those are together? So now, once I’ve got that done, I would normally clip that off the end and make sure that’s nice and straight and make sure that my wire nut is going to cover the exposed copper. Then I take the wire nut and I screw the wire nut on. Now, what I’ve got are all my neutrals are together and I’ve got this one wire that’s much longer when I push these other wires back into the box.
Now, you can imagine, how much easier this is to work with than trying to connect an outlet to these short wires. So, I’m going to go ahead and do that to the black wires and the copper wires. So, once the pigtails are made, you want to take all of your wires, fold them up like an accordion, and push them into the back of the box.
Now you’ve got wires that are plenty long to work with. Now, you don’t need excessive wires. So, I usually come about 6-7 inches out of the box and clip them off. So, my hand just happens to be the right size, so I’ll take them and I will clip them off like that. And I’m ready to put in a news outlet. Just strip these and make fresh connections.
So, that’s how you make an electrical pigtail. If you found this information helpful and informative, go ahead and give us a thumbs up! If there is anything else you’d like to know how to do, when it comes to your electrical, plumbing, heating, or air conditioning systems, leave your suggestions in the comments below.
Don’t forget to subscribe! We’ve put a BIG subscribe button RIGHT THERE! That way, when you click it, you’ll get notifications next time new videos come out.
Have a great day – thanks for watching!
Nov 11th, 2016


